What is a “seamless” texture or a “tileable” texture?
Check out our blog post on ‘What is a Seamless or Tileable Texture?‘ It’s super short and will tell you everything that you need to know. However, to put it simply, a seamless texture is an image that can be placed next to itself (above, below, or side-by-side) without creating an obvious seam, join or boundary between the copies of the image.
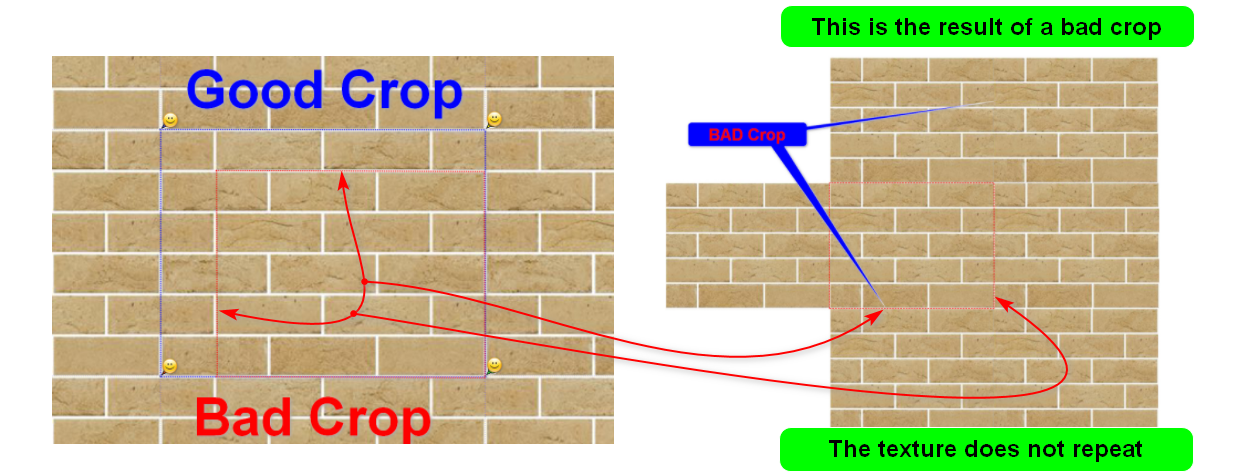
How do I create a seamless texture?
The most IMPORTANT thing is that you need the right image. If you start with the wrong image, you are destined for failure. The first question is: Does the image that you want to use do the product justice? If it doesn’t look sexy in the first place, don’t bother trying to make it seamless!
You should look out for things like:
Is the image taken in an even soft light with no shadows?
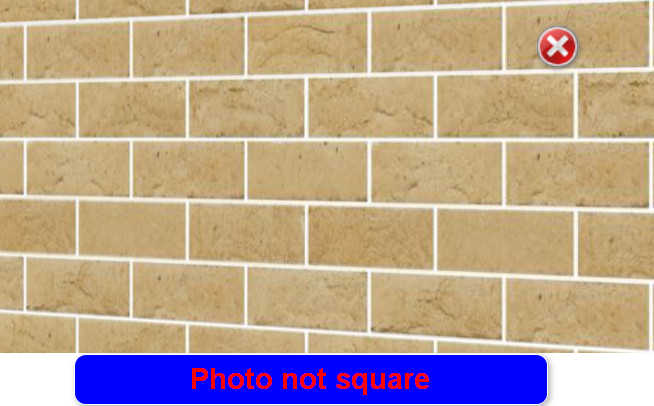
Is the image taken square on to the subject?
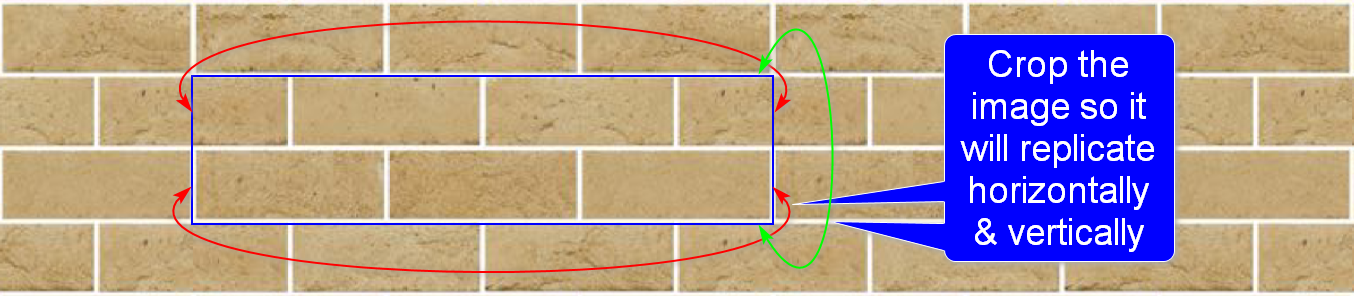
Once you find the right image you will need to crop the image in a way that the join is not evident once the images are tiled vertically and horizontally. This will take a bit of trial and error, but after you have done it a few times it gets far easier!
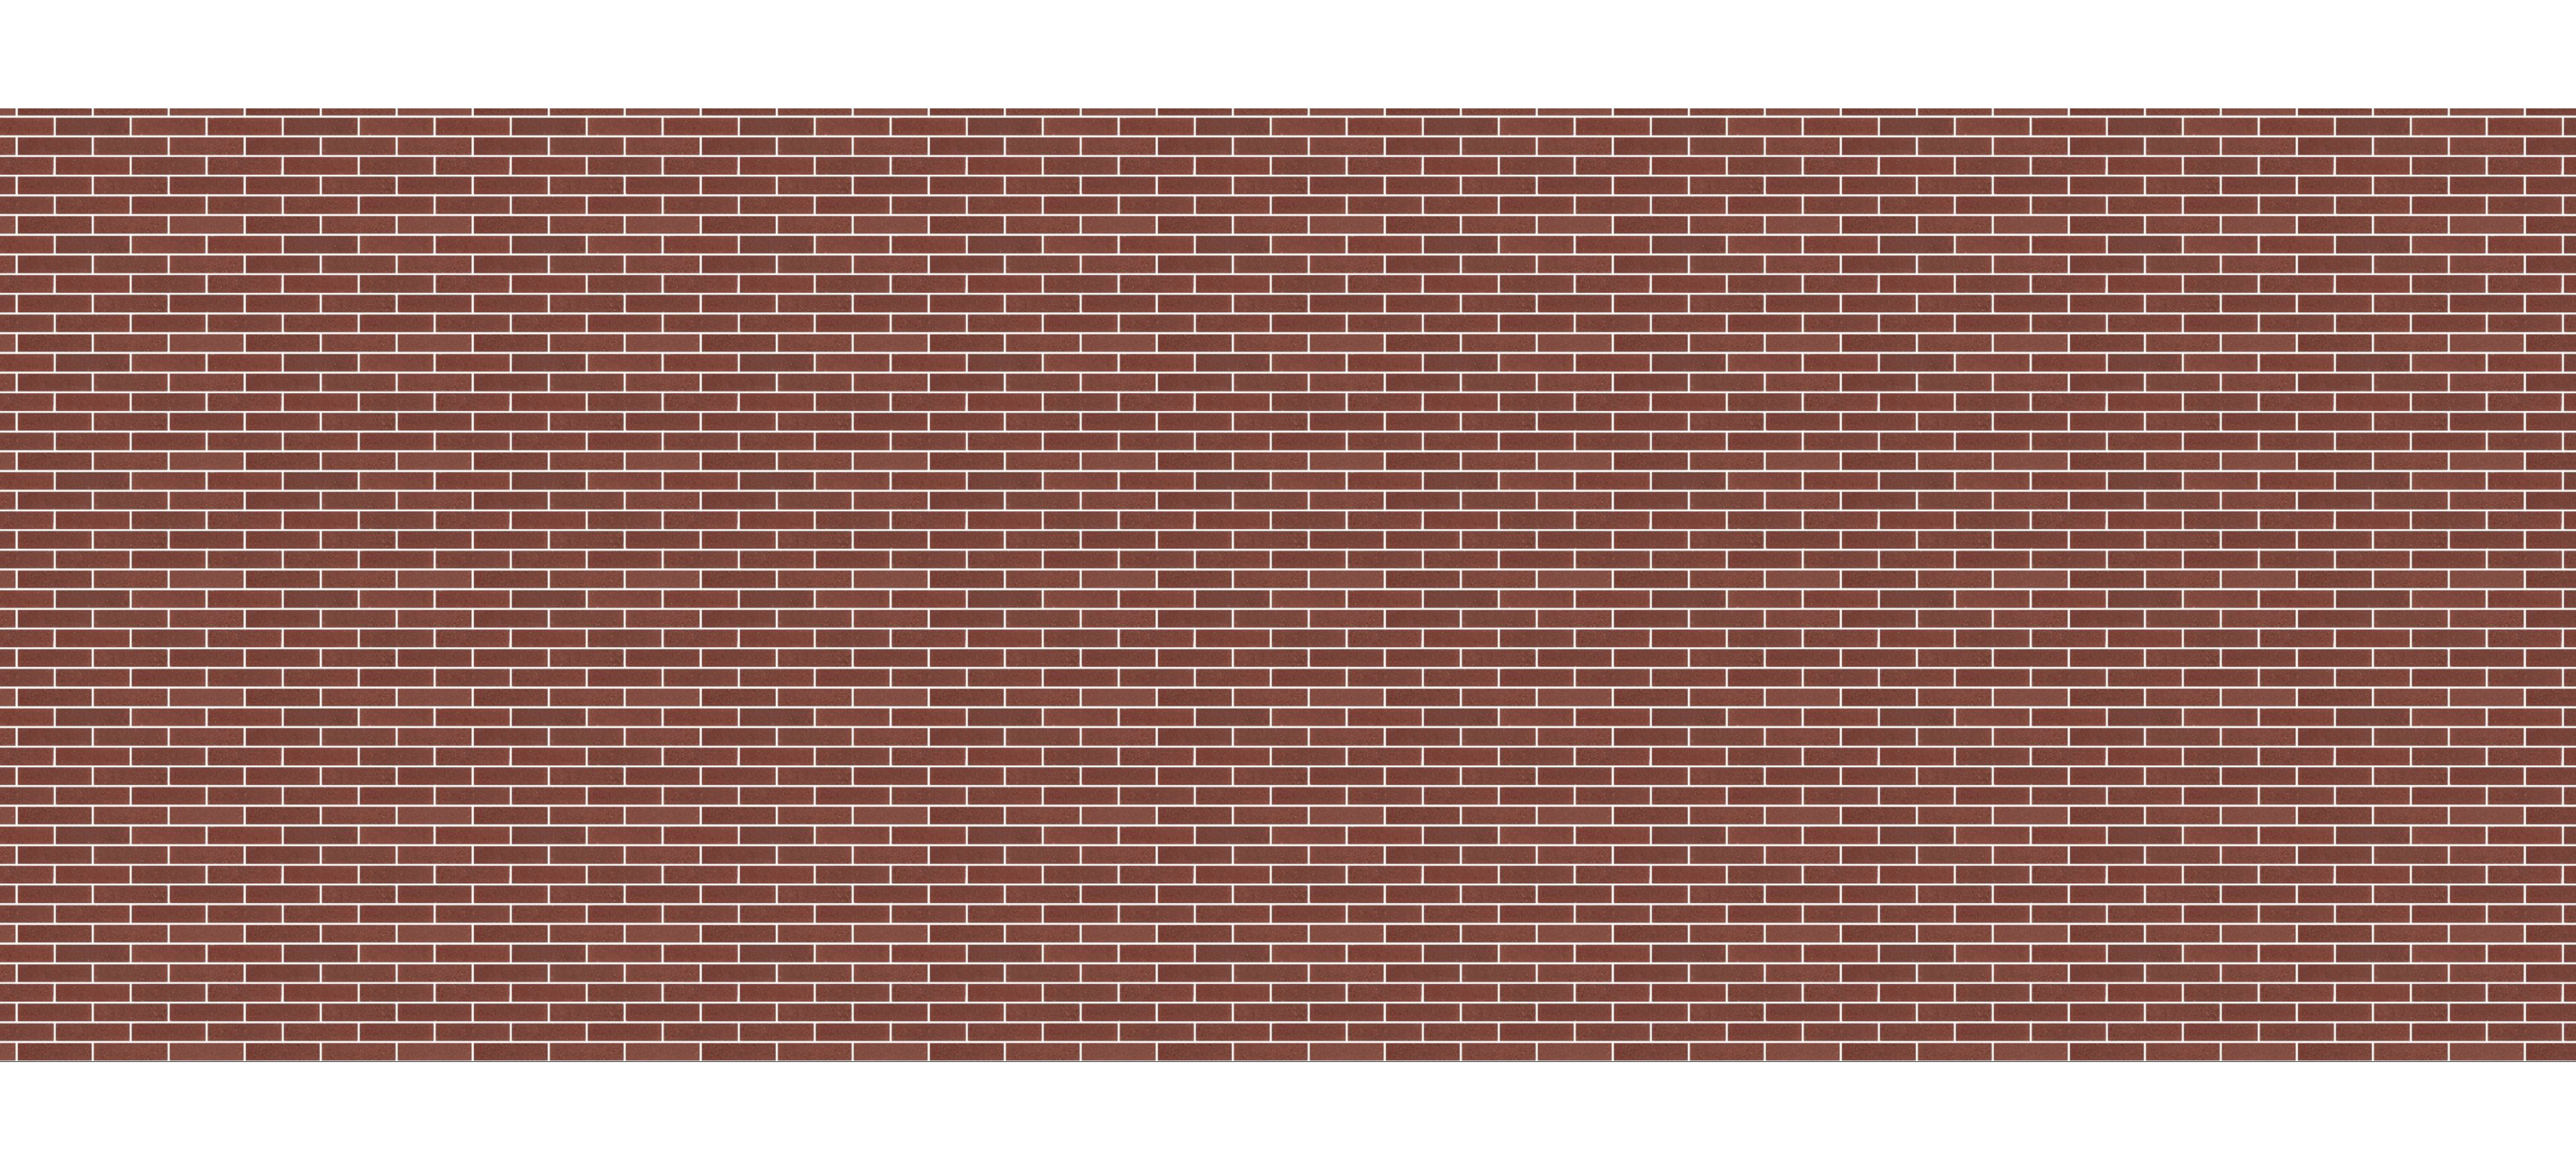
Example of a good quality Seamless Texture. *Click to Enlarge*
What should I know before creating a seamless texture?
Before creating a seamless texture, you need to consider how you will be using it. For example, will the image that it is used in be printed on a huge bill board? If so, you’ll need a very high resolution image that does not pixelate when printed.
However, if you will be using it for Architecture, Design or Estimating (such as PlusSpec for SketchUp), you will want to keep the image resolution low, so that it does not slow down your software.
What software do I need to create a seamless texture?
Once you have selected and saved the image that you want to use to create a seamless texture, you will need to use a software that allows you to crop and manipulate the image. PhotoShop™ is one of the most popular choices, but it comes at a cost. However, there are free options, such as Gimp™ and Faststone Capture. There is a free version of Faststone capture, but the paid version is very affordable. We highly recommend it.
After you have loaded your image in the software that you are using, you will be able to zoom in on the area that you want to tile. You will be cropping the image so that when you place a copy of that image side-by-side, there will be no noticeable seam or join. Once you are happy, save the file as a JPG.
IMPORTANT: Make sure that you understand the resolution of the image. It may be beneficial to save a high res and a low res version. We recommend the following naming convention, although you can use whatever you like: “Imageproductname_range_manufacturer_size”
5 of the most common mistakes when creating a seamless texture
- Incorrect crop
- Too many pixels or too much resolution for the end user’s needs
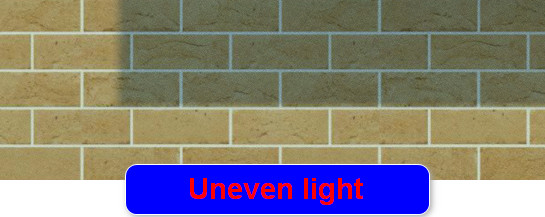
- Uneven lighting across the image
- File size: very complex seamless texture used for BIM, CAD, VDC, estimating or rendering should never be larger in file size that 145kb. The majority of brick textures should be around 20kb to 30kb. There is an art to getting visually high resolution with low file size. If you need a pro to do this or to get you started click here.
Tips and tricks for creating a seamless texture
Many people make the mistake of tiling the texture and re-cropping more of the repeated texture to make it look bigger as a swatch. This is not good practice as essentially you are creating a larger file size. There is a rule of the thumb that we try to adhere to, and you should too, when creating textures for CAD:
- If a product is uniform in color, only a small area (Eg 3 bricks wide by 3 brick high) is required.
- If the product is a natural product and you want to show variation (EG a brick blend) you will need to crop a larger number of bricks because you will get a repeating pattern that will not look real when it is placed in a model.
Another useful tip (which can be a bit tricky) is to flip your image vertically and horizontally and then crop it. This will enable you to get more variation in your texture before saving.
Can I take photos of products that I want to use for a seamless texture?
Definitely. You can even use your mobile phone. Our tip is to take a photo on an overcast day. Make sure the camera is parallel to the image in both directions, as editing an image taken with the wrong Field Of View (around 30 degrees) will be difficult to tile.
In an ideal world your camera has grid line and the grid lines line up exactly with the extremities of the texture required.
Where can I find examples of seamless textures?
Here are some free examples of brick seamless textures in skp format.
Because most CAD software use seamless textures, many building manufacturers have a library of their products as seamless textures on their websites. This is the best place to look first.
Who can I get to make seamless textures for me?
Don’t have the time or inclination to create seamless textures? We don’t blame you. For a small price, we can help.
Contact Us to find out more.
Leave a Reply
You must be logged in to post a comment.